Reader Review
I have made this twice in the last 8 days. I can't wait to make it again!!! It's simple. It's very tasty. It's Not Dry! It's.. not dry!! It tastes great!
Sylvia

Please note: As an Amazon Associate I earn from qualifying purchases made by clicking the links in my post.
The magic of homemade challah bread
This bread has the consistency of a brioche bread due to the addition of the eggs and egg yolks making it perfectly fluffy and soft.
If making the dough ahead of time, after the first rise and after shaping, place the dough in the fridge for the second rise and bake in the morning.
This is a simple, 4-strand braid. Details about how to braid with four strands are included below and in the recipe itself. There is also a video included showing how to braid this challah.

The magic of Tangzhong Challah braided loaf bread
Unlike most Challah recipes, this one begins by making a flour paste known as a tangzhong. This is simply a mixture of flour and water that's heated, or pre-cooked, to form a paste. This technique produces softer yeast breads which is exactly what we want in a challah.


How to make the Best Challah Bread recipe

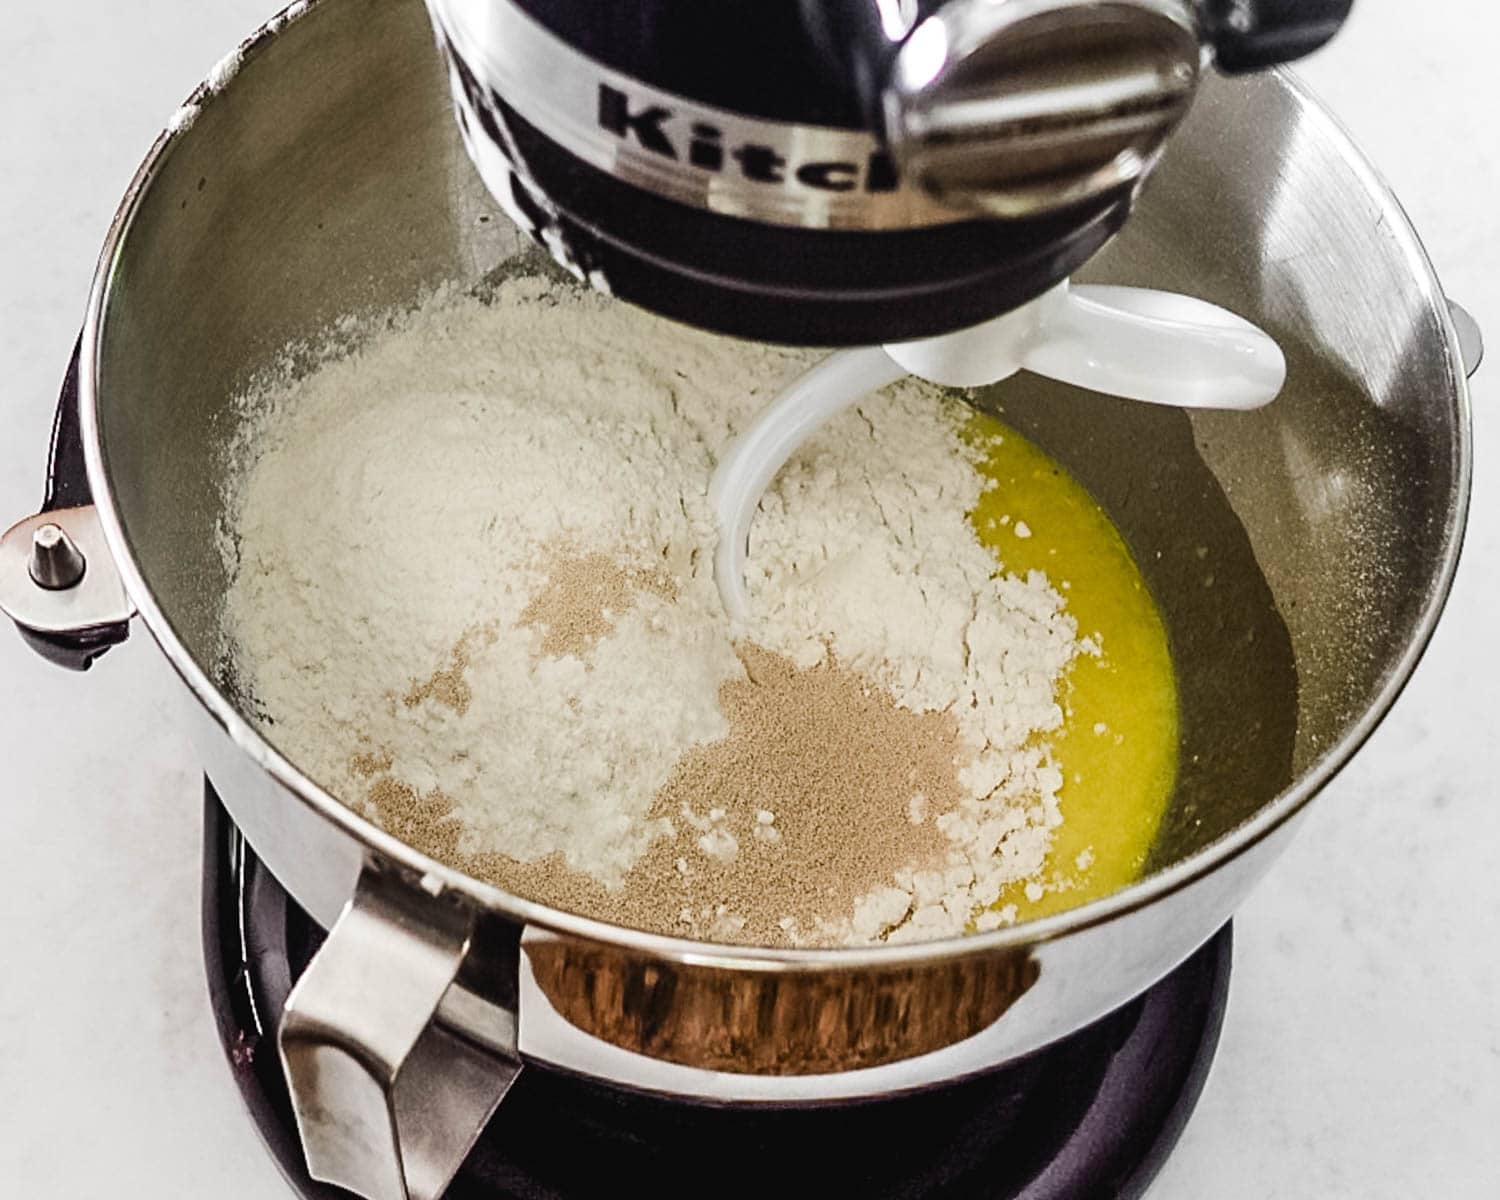
add the flour and yeast.
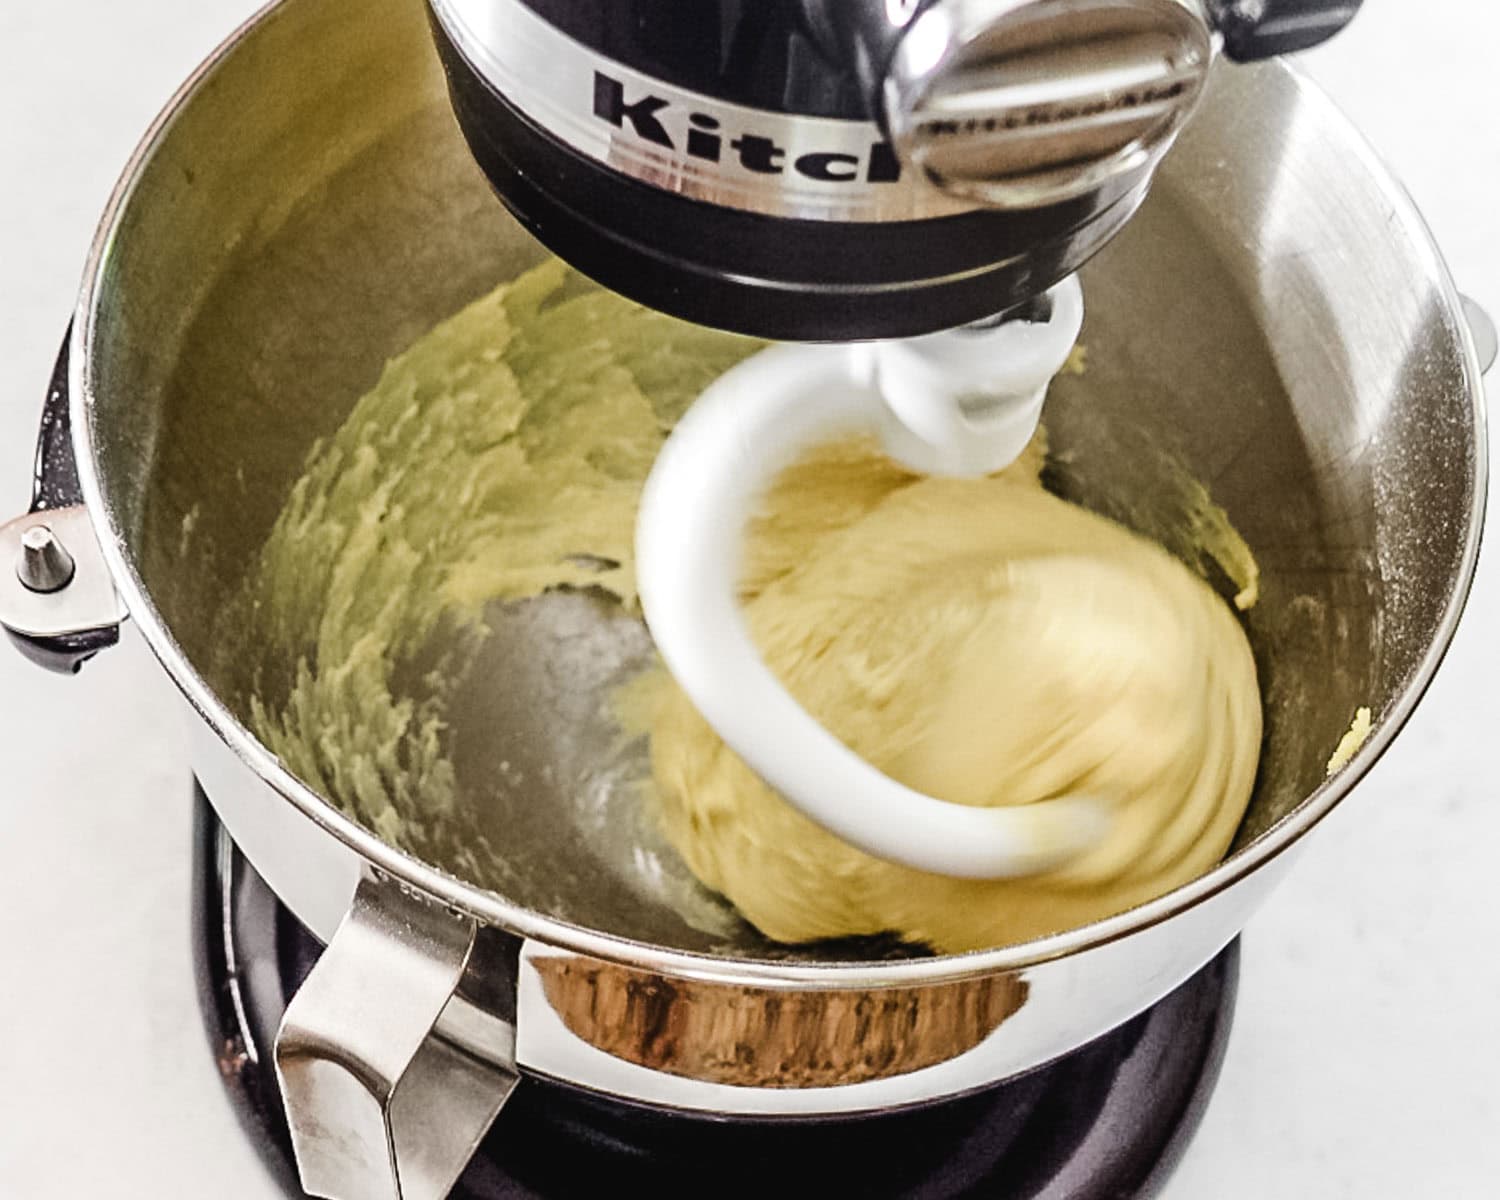


Proofed challah dough.
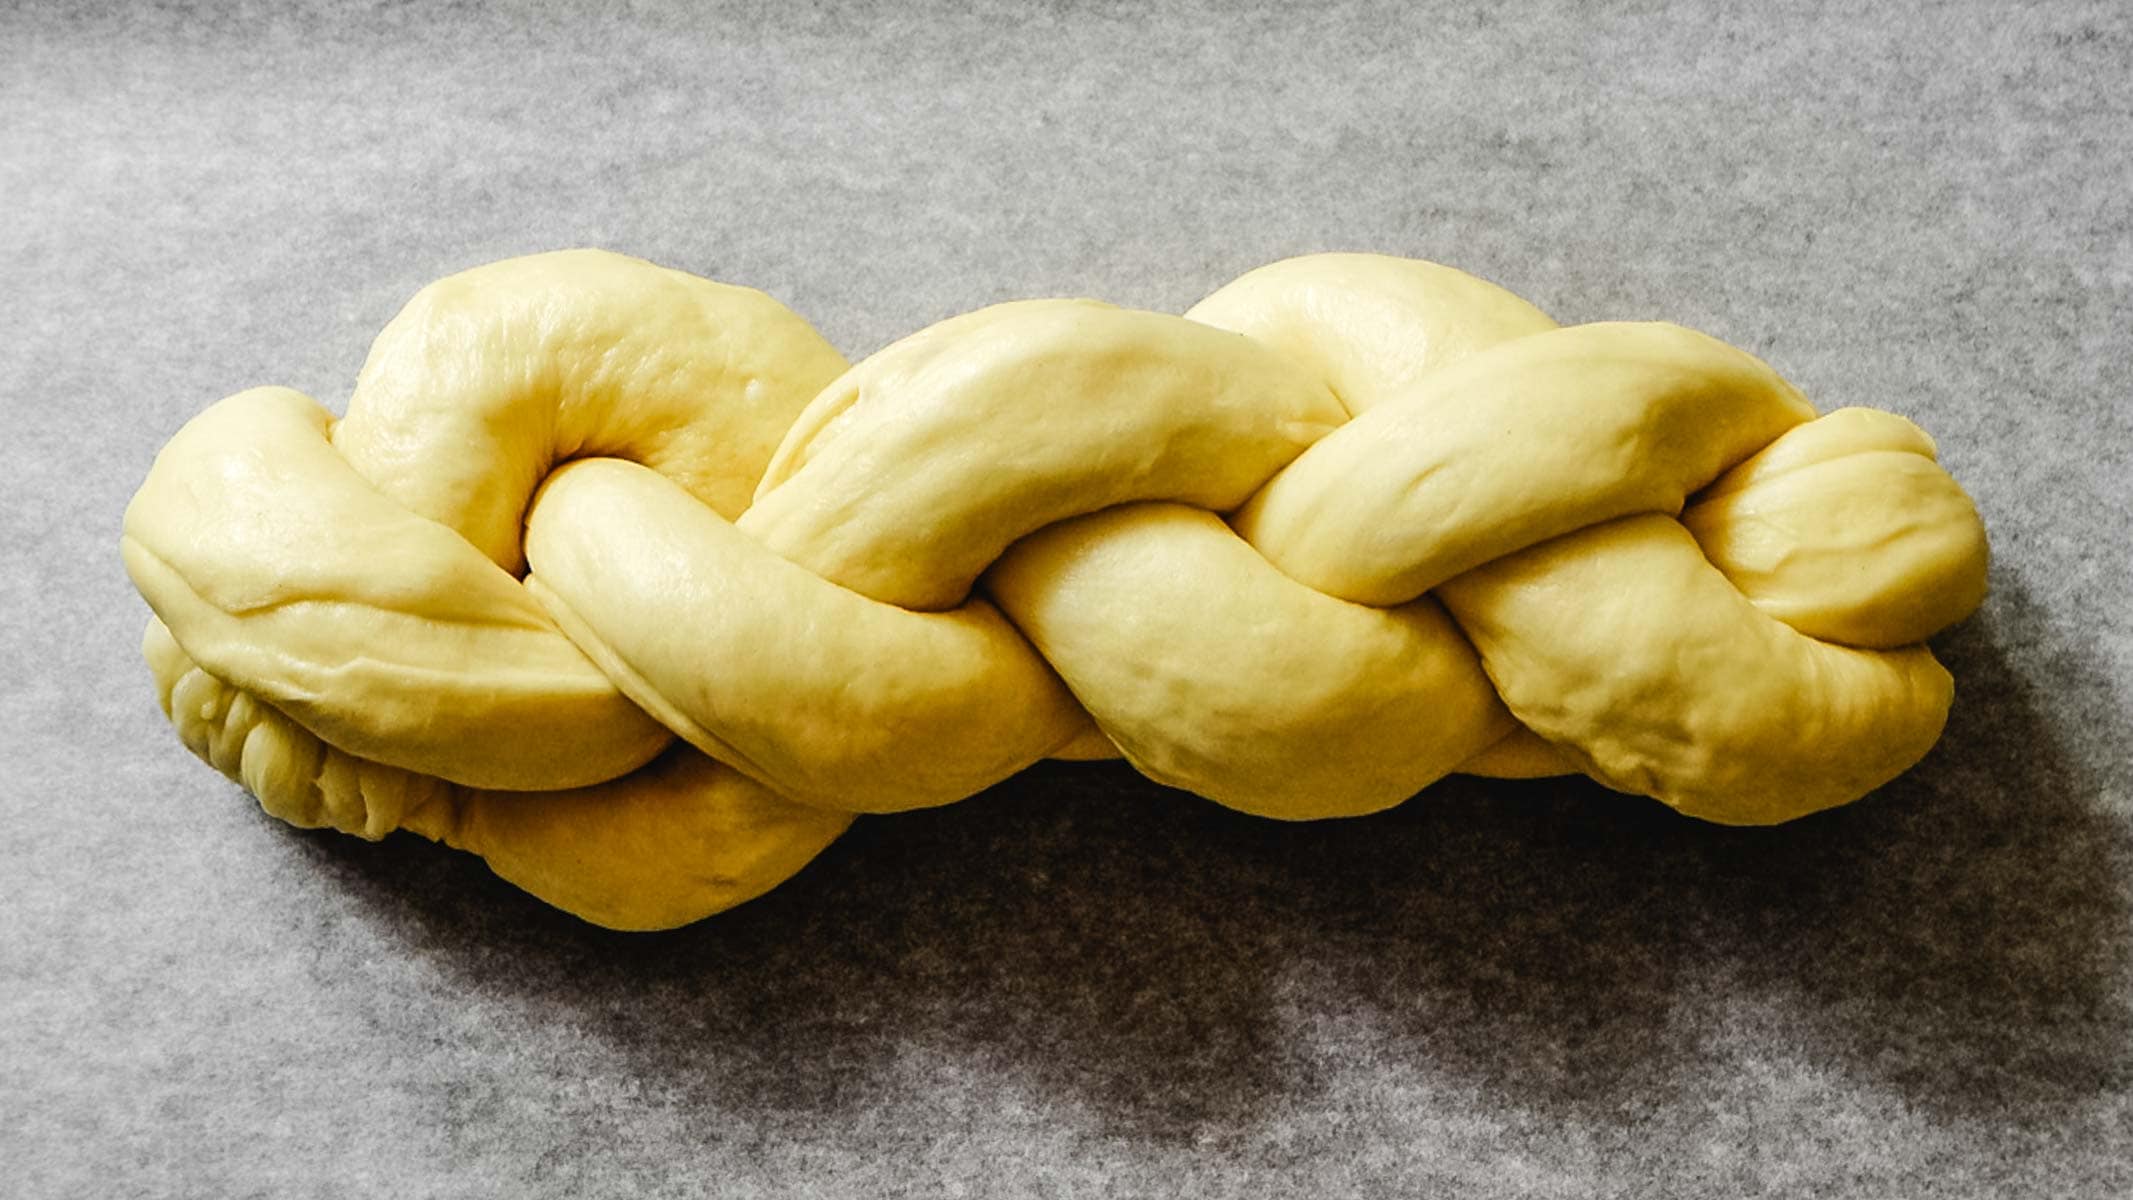
Braid the Dough: Lift the rope at 12 o’clock, bring over the center, and place in the 5 o’clock position.
Lift the rope at 6 o’clock, bring over the center, and place in the 12 o’clock position. Lift the rope at 9 o’clock, bring over the center, and place in the 4 o’clock position.
Lift the rope at 3 o’clock and, working toward yourself, bring over the braid and place in the 8 o’clock position. Adjust ropes so they are at 12, 3, 6, and 9 o’clock positions
Repeat these steps, working toward yourself, until you there is no dough left to braid. The loaf will naturally list to one side. Pinch the ends of the rope together and tuck both ends under the braid.
How to Braid 4-Strand Challah Video (<1 Minute)
To Store Challah Bread
Bread can be stored at room temperature in a bread bag, bread box or plastic wrap for 3-4 days. Refrigerate for up to 1 week
To freeze, slice bread and place in a single layer on a baking sheet. Freeze for at least an hour then place in a freezer-safe bag and store in freezer for up to 3 months. Thaw at room temperature or defrost in the microwave at 50% power

Pro tips for making fluffy challah bread
- Most bread recipes call for you to knead your bread on a lightly floured surface. For this challah bread recipe, it is not recommended that you flour your kneading surface. This is because friction is needed to roll and braid the ropes of bread dough. Also, this is a stiff and dry dough, so adding additional flour will increase the dryness, resulting in a much drier and denser loaf of bread. Nope, we do not want that
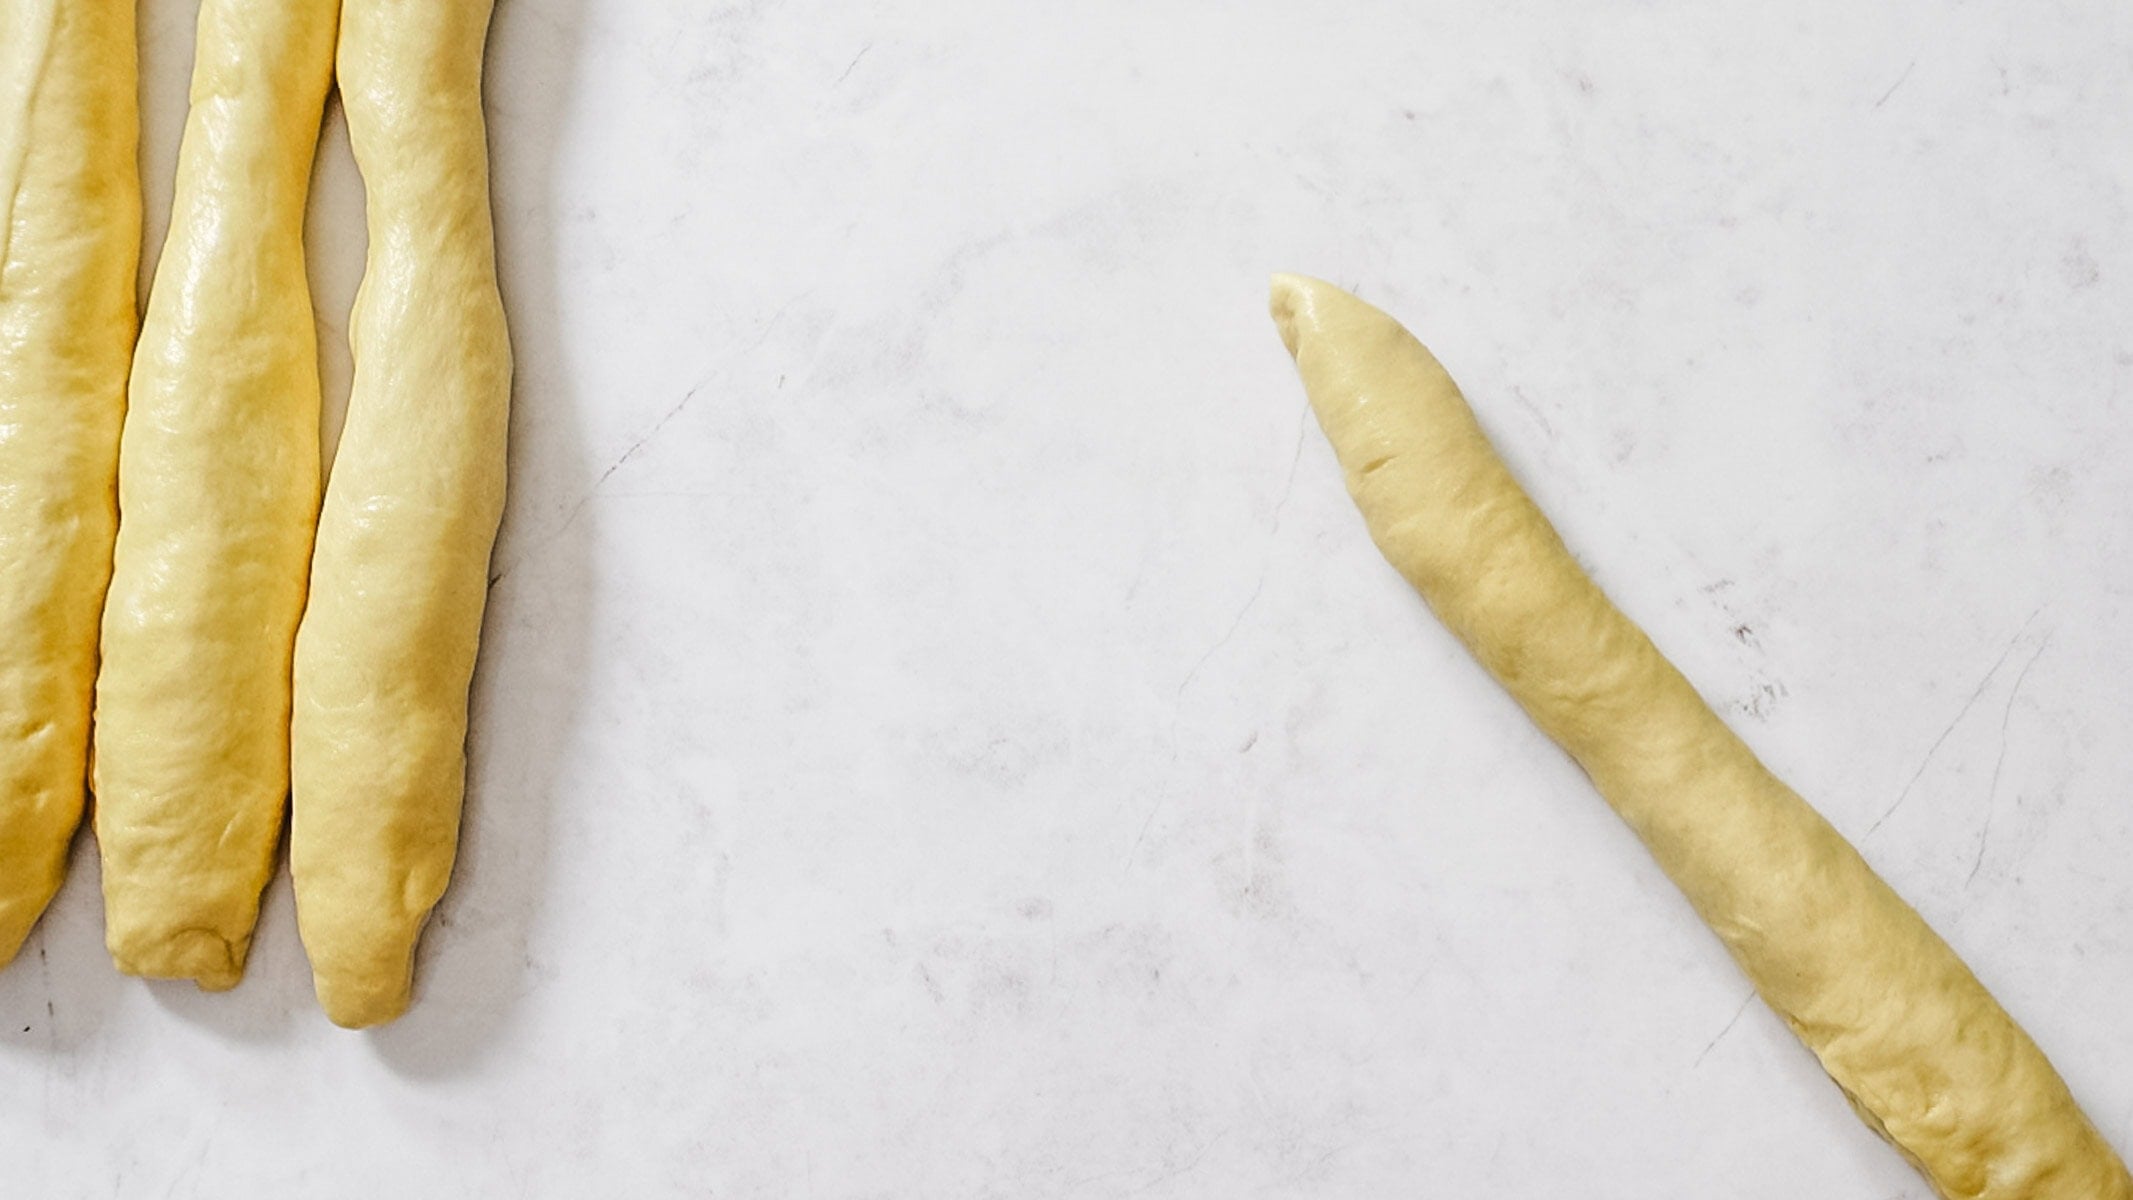
- When rolling out the 4 strands of dough for this challah recipe, taper the ends of all the ropes. This helps you create ends that are less bulky and more proportionate to the rest of the braid. Bulky ends may also require more baking time which could result in overbaking of the rest of your loaf
- Rather than baking your challah bread on a single baking sheet, stack two baking sheets on top of one another to keep the bottom of the loaf from getting too dark or burnt
- As difficult as it may be, follow the recipe instructions to allow the challah loaf to cool completely for at least 2 hours before slicing and eating. (Good luck with that one!)

Make ahead
To make this challah dough ahead of time: after the first rise and after braiding the dough, cover lightly with plastic wrap and place in the fridge overnight. Remove from the fridge 30 minutes prior to baking
Vegan Challah
Vegan challah, also known as water challah, contains no eggs or honey. You're better off looking for a recipe that is specifically for vegan challah or water challah rather than trying to adapt this recipe. This will ensure the best results.
To substitute honey instead of sugar
The rule of thumb when swapping sugar for honey in baked goods is the following: For every 1 cup of sugar, substitute ½ to ⅔ cup honey and subtract ¼ cup of the water from the recipe.
To swap the granulated sugar for honey in this easy challah recipe, use ⅛ cup (2 tablespoons) honey and reduce the water in the dough to ⅛ cup (2 tablespoons). Add the honey with the flour and yeast in step 2 of making the dough. After the 20 minute rest, add the salt and knead.
Enjoy a sourdough bread but want to serve challah? Bake some sourdough challah that is great at dinner or perfect for breakfast!
Like this recipe? Follow me on Pinterest for lots more recipes just like this one! And don’t forget to pin this recipe for later by clicking on one of the images below the recipe. Or, click on any of the images in this post to save to Pinterest.
Looking for more delicious bread recipes? Give these a try:


Ingredients
Flour Paste (Tangzhong)
- ½ cup water
- 3 tablespoons bread flour
Challah Dough
- ¼ cup water
- 2 tablespoons vegetable oil
- 1 large egg
- 2 large egg yolks (reserve egg whites for egg wash, if desired)
- 2 ¾ cups bread flour
- 1 ¼ teaspoons instant yeast or rapid-rise yeast
- ¼ cup granulated sugar
- 1 teaspoon kosher salt
Egg Wash
- 1 large egg or reserved egg whites from dough
- pinch kosher salt
- 1 tablespoon sesame seeds, poppy seeds, or everything bagel seasoning optional
Instructions
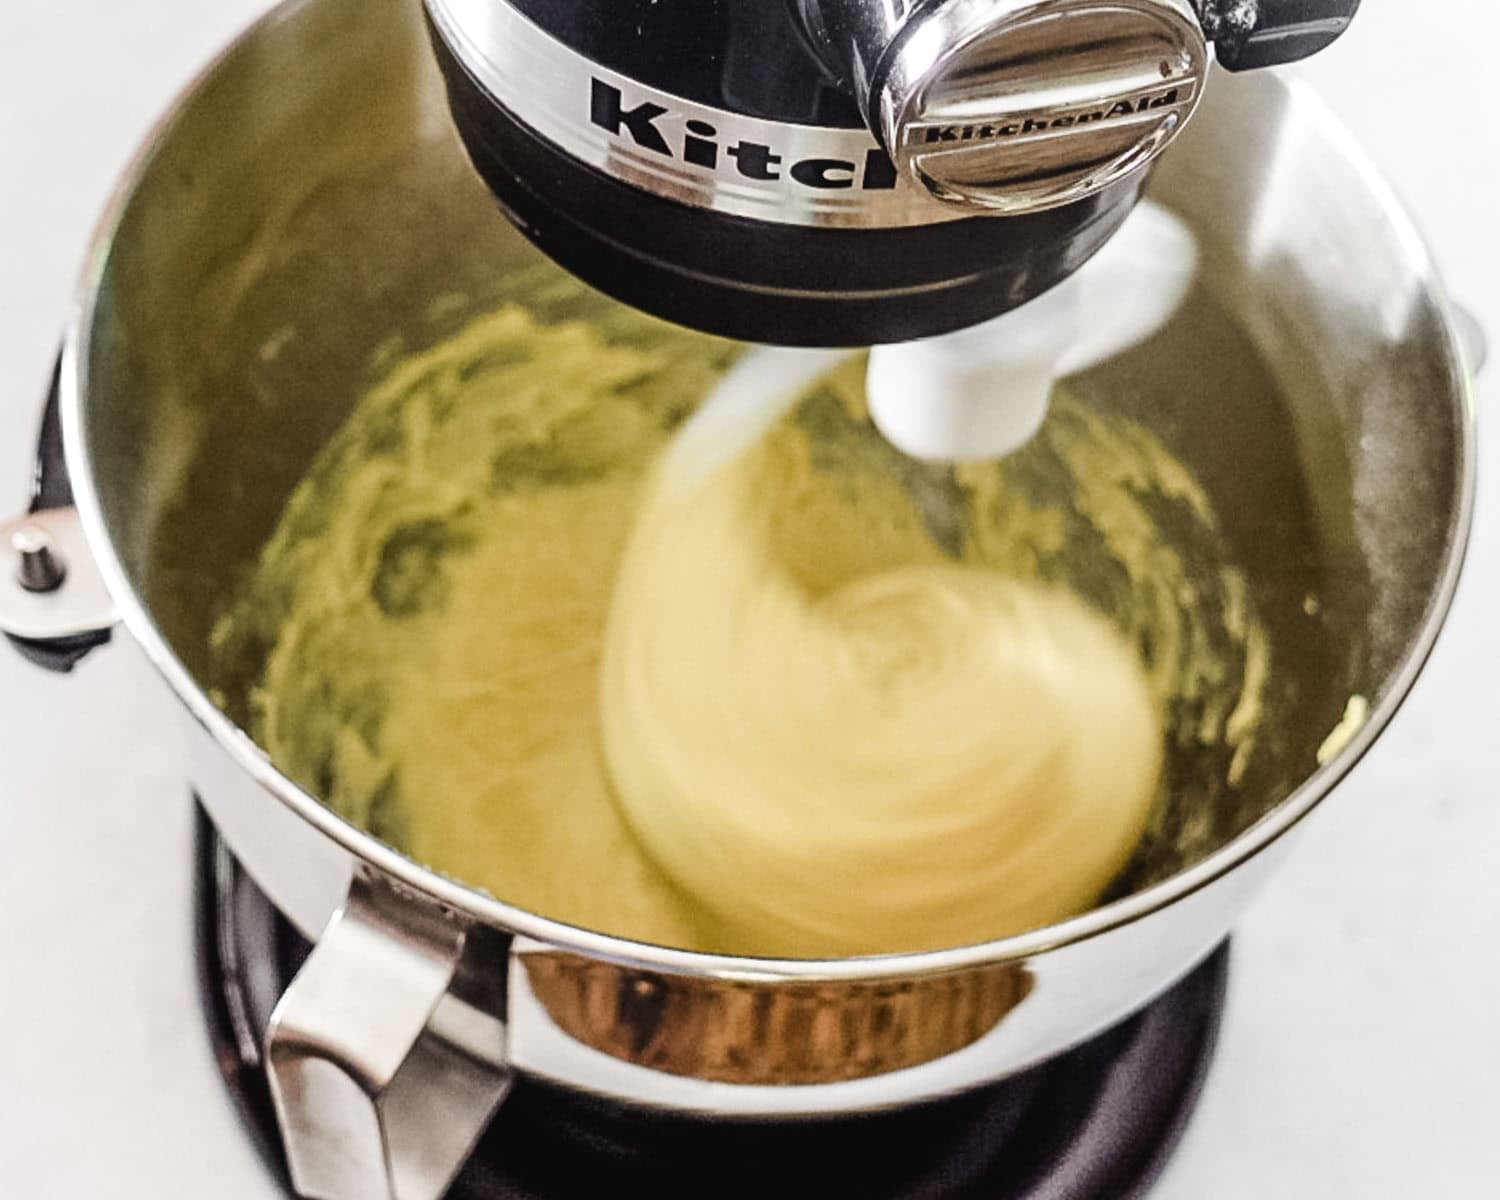
Make Flour Paste:
- Whisk water and flour in a small bowl until no lumps remain½ cup water, 3 tablespoons bread flour
- Microwave, whisking every 20 seconds, until mixture thickens to a stiff, smooth, pudding-like consistency that forms a mound when dropped from the end of a whisk into the bowl, about 40 to 80 seconds
Make the Dough:
- In the bowl of a stand mixer, whisk together the flour paste from Step 1, water and vegetable oil. Then add the egg and egg yolks. Whisk well until combined1 large egg , ¼ cup water, 2 tablespoons vegetable oil, 2 large egg yolks
- Add the flour and yeast. Fit mixer with dough hook and mix on low speed until all flour is moistened, 3 to 4 minutes. Cover with a clean towel and let stand for 20 minutes2 ¾ cups bread flour, 1 ¼ teaspoons instant yeast
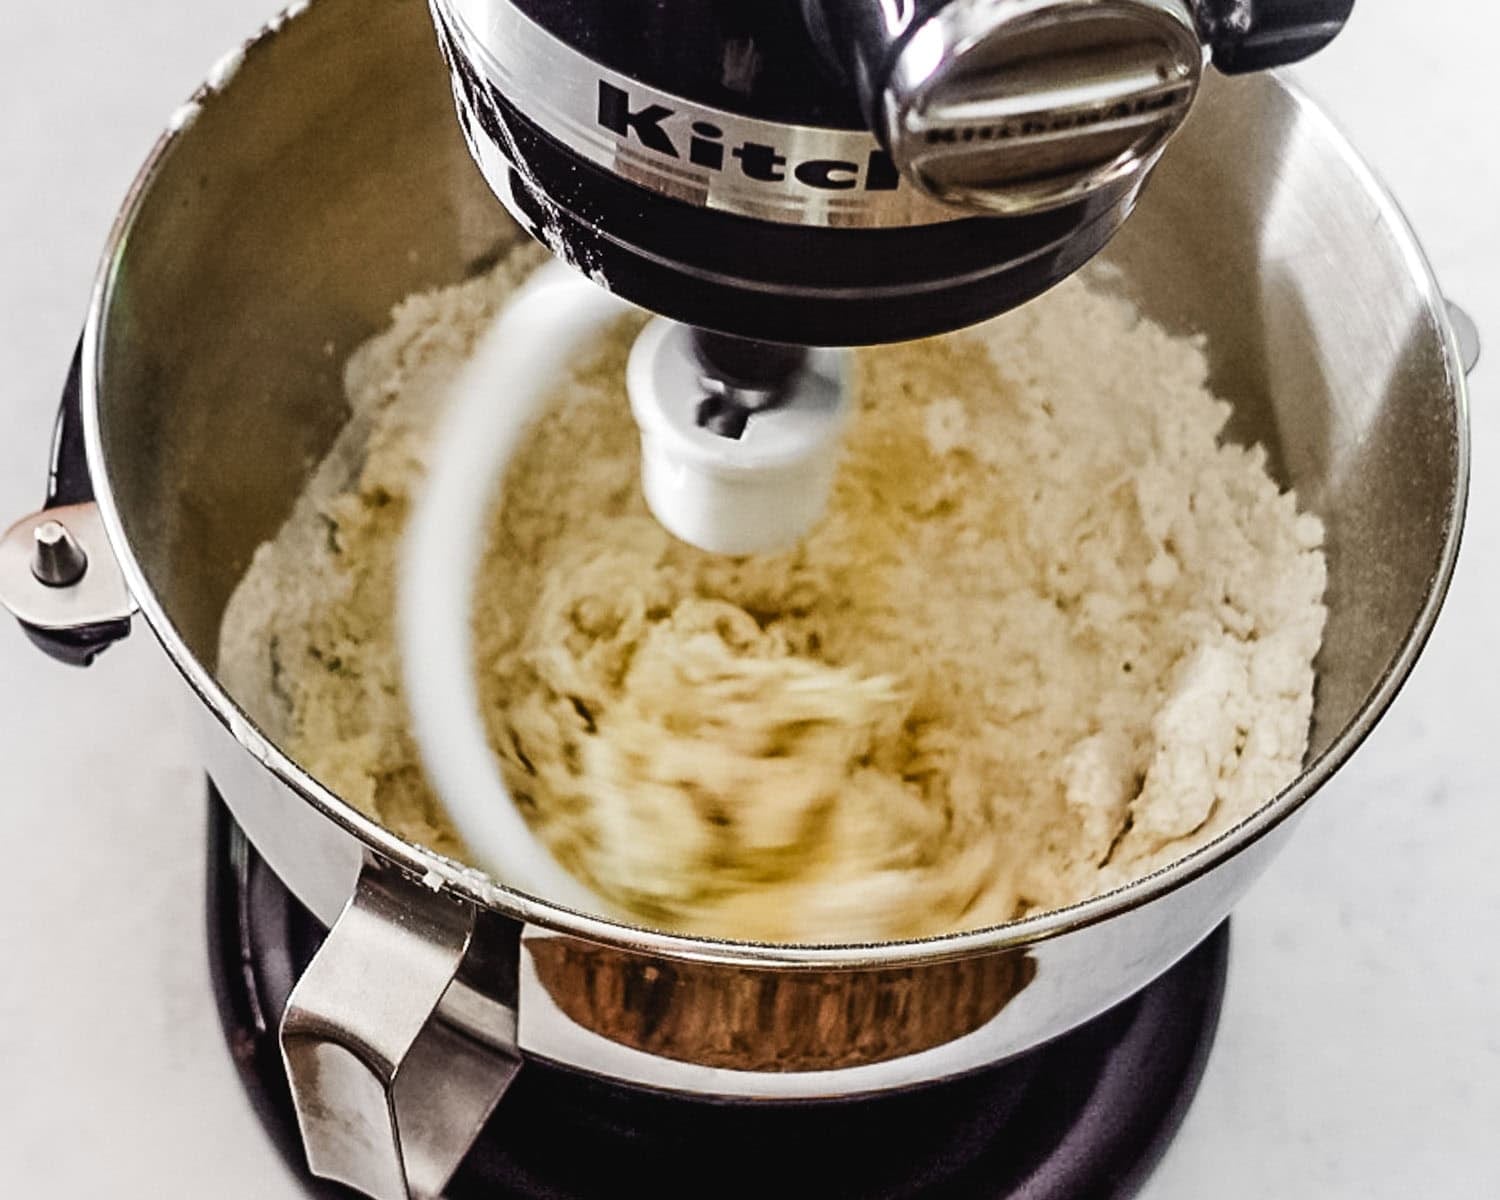
- After the 20 minutes, remove the towel and add the sugar and salt to the bowl. Knead on medium speed for 9 minutes. Dough should be wrapped around the dough hook without sticking to the bottom or sides of the bowl. If the dough is sticking, add more flour, 1 tablespoon at a time, up to ¼ cup more, allowing the flour to fully incorporate before adding more¼ cup granulated sugar, 1 teaspoon kosher salt
- Transfer the dough to a clean counter and lightly coat the now-empty mixing bowl with vegetable oil. Form the dough into a ball and return it to the oiled bowl, turning to coat all sides lightly in oil. Cover the bowl with plastic wrap. Let the dough rise until about doubled in volume, about 1-1 ½ hours
- Line a rimmed baking sheet with parchment paper and stack on top of a second rimmed baking sheet to prevent the bottom of the bread from getting too browned or burnt. Set on your counter next to where you'll be shaping the dough
- Remove the dough from the bowl onto clean counter and press into an 8-inch square, expelling as much air as possible
- Cut the dough in half lengthwise to form 2 rectangles. Cut each rectangle in half lengthwise. You should have 4 equal strips of dough. Roll 1 strip of dough into a 16-inch rope. Continue rolling, tapering ends, until rope is 18 inches long. Repeat with remaining dough strips. Arrange ropes in plus-sign shape, with the ends overlapping in the center by ½ inch. Firmly press the center of the plus sign in the center to seal the ropes to each other and to the counter
Braid the Dough:
- Lift the rope at 12 o’clock, bring over the center, and place in the 5 o’clock position. Lift the rope at 6 o’clock, bring over the center, and place in the 12 o’clock position. Lift the rope at 9 o’clock, bring over the center, and place in the 4 o’clock position. Life the rope at 3 o’clock and, working toward yourself, bring over the braid and place in the 8 o’clock position. Adjust ropes so they are at 12, 3, 6, and 9 o’clock positions
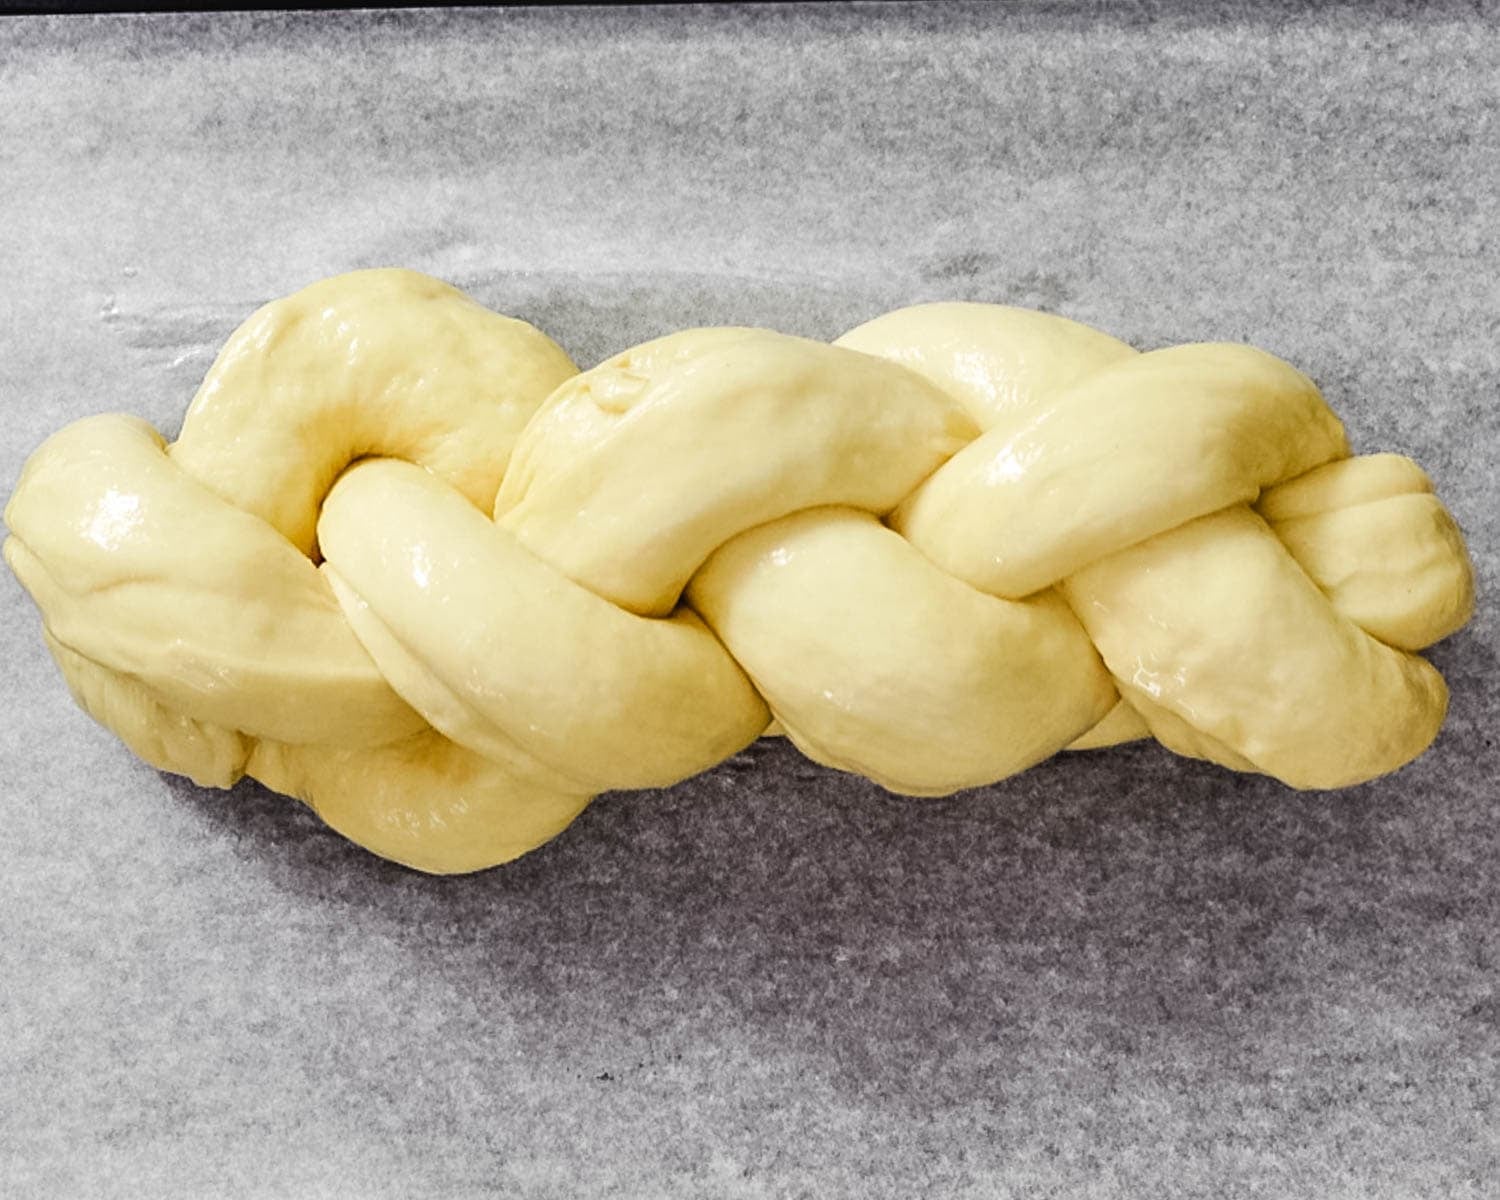
- Repeat these steps, working toward yourself, until you there is no dough left to braid. The loaf will naturally list to one side. Pinch the ends of the rope together and tuck both ends under the braid. Carefully transfer the braid to the prepared baking sheet. Cover loosely with plastic wrap and let rise until the dough does not spring back fully when gently pressed with your knuckle, about 1-2 hours*. Rise time will vary based on the temperature of your kitchen
Make the Egg Wash:
- 30 Minutes before baking, adjust oven rack to the middle position and preheat oven to 350º F. Whisk together egg (or reserved egg whites) and salt. Brush the loaf with egg wash and sprinkle with sesame seeds, poppy seeds, or everything bagel seasoning, if using1 large egg, pinch kosher salt, 1 tablespoon sesame seeds, poppy seeds, or everything bagel seasoning
- Bake until the loaf is a deep golden brown and registers at least 195º F, 30 to 35 minutes. Let the loaf cool on the baking sheet for 20 minutes. Transfer baked loaf to a wire rack and let cool completely before slicing, about 2 hours
Video
Notes
- *If you would prefer to bake the challah the next day, after shaping, cover lightly with plastic wrap and place in the fridge overnight, up to 12 hours. Remove the braided dough from the fridge when you preheat the oven to allow it to come to room temperature before baking.
- Bread can be stored at room temperature in a bread bag, bread box or plastic wrap for 3-4 days. Refrigerate for up to 1 week.
- To freeze, slice bread and place in a single layer on a baking sheet. Freeze for at least an hour then place in a freezer-safe bag and store in freezer for up to 3 months. Thaw at room temperature or defrost in the microwave at 50% power.
- Recipe adapted from Cook’s illustrated Magazine, May & June 2019.
Nutrition


Comments
BostonBakes says
This recipe is a huge hit! I’ve now baked this twice and the family all agree that the flavor is excellent! I have a question about letting the dough rise overnight in the fridge; do I place the braid into the fridge right away, or do I let it rise until it passes the knuckle test and then refrigerate? Or do I refrigerate right away, and then once it’s room temperature let it rise until it passes the knuckle test? Thank you for this delicious recipe!
Kimberlee Ho says
That's great to hear!!
Ariela says
The recipe was absolutely amazing. I made it for my family’s Friday night dinner, and there were no leftovers. I expected for 3/4ths to be left over, as it usually is with my family, but it was impossible to stop eating. The outside of the challah was a beautiful golden color. And the inside was so light, soft, and incredibly fluffy. It literally melts in your mouth. Thank you for making an incredible challah recipe!!
Kimberlee Ho says
Wonderful!!
Zelda says
This is by far the best challah recipe I’ve ever made. And, interestingly, it’s neater in the kitchen - not sure why but it makes less mess! The dough comes out like a baby’s bottom, very satisfying and pleasant to braid. You can refrigerate the shaped braid overnight! Just let it proof until doubled and bake.
Kimberlee Ho says
So thrilled to here this! Thanks for sharing your overnight tips - it's super helpful for other bakers!
Nathalie Legendre-Lozman says
Hi,
So I made the challah today and thank you for sharing your recipe. My daughter has been asking me to make one for almost 2 weeks. While the recipe was easy to follow and the bread was good, I am not sure it is chewy enough for my taste. I also found it to be tasteless. Not sure if the amount of salt is enough for this recipe. I am a sourdough baker and I base my bread on the baker's percentage. So maybe I will add about 7 grams of salt rather than 5 grams and 7 grams of yeast. I may also increase the fluid by adding a full egg to bring the hydration to 65%. The recipe now is at 55%. I will let you know what I come up with.
Again it was not a bad bread, my daughter liked and so did I, but something is missing and I will work on it to make it better.
Kimberlee Ho says
I'm sorry to hear this, Nathalie! I appreciate your feedback. I made this recipe twice this weekend and I found the challah to be flavorful and a great texture, so I'm sorry you weren't able to achieve this, too.
Nathalie Legendre says
Kimberly, like I said it is not a bad recipe.
I made it again, but this time I used a Japanese flour used to make Japanese milk bread, I also did 1/2 sugar and 1/2 honey, I increased the salt for a total of 2%. I offered it to a teacher who said it was the best challah he had had. So this week end I am going to repeat it with the same changes and will try it this time. I will post again to let you know.
Kimberlee Ho says
Wonderful! Thanks so much for sharing this, Nathalie! I am going to try it with Japanese flour too 😊 .
Zelda Pinwheel says
Well. That was simply the best challah I ever made, and I've made a few.
Kimberlee Ho says
How wonderful to hear!!
Ken says
Excellent recipe! Made this challah many times. Overnight method real timesaver. Easy 4 braid. Lay braids vertical and connect at top. Braid on left is always 1. 1 over 2 under 3 over 4. Repeat as many times as needed.
Kimberlee Ho says
Awesome! Thanks for sharing!!
Katie says
The instructions call for a second rise, after shaping and braiding. Then there is a note that says it can be refrigerated after shaping and baked the next day. But it doesn’t mention doing the second rise the next day when you take it out of the fridge. Is the overnight cold retard in place of the second rise? You should clarify what happens to the second rise if you’re refrigerating for a delayed bake. Thank you.
Kimberlee Ho says
Yes, the overnight in the fridge counts as the second rise. I will update this in the recipe so it's clearer. Thanks!
Sylvia Jalomo says
I love this Challah.
It's not like other recipes.
My friends love this Challah.
My family loves this Challah.
It's tender.
It's delicious.
It's moist. Yes, I said it. M. O. I. S. T moist.
It's such a beautiful dough to work with.
I often make 3 smaller loaves with it but absolutey love making it into 1 large loaf.
Kimberlee Ho says
This makes me so happy, Sylvia! Thank you so much for sharing this great feedback!
Maddie says
I’m excited to make this, but I’m afraid that my instant yeast might not be alive anymore. Can I bloom it like I would with active dry yeast, or would it be a problem to add the yeast and water to the dough at the same time? Thanks!
Kimberlee Ho says
Hi Maddie, you can try adding some of your yeast to water. Instant yeast should start foaming right away and smell yeasty. If it sinks to the bottom or there's no foaming, I would get new yeast.
Beverly says
Hello Kim
The loaf turned out amazing!
Thank you. Just wondering why the 2 hour on the rack?
Kimberlee Ho says
So happy you love it! Well, technically the loaf should cool before cutting to prevent a gummy texture, however, I know how difficult it can be to wait that long! If you have cut into it sooner without any issues, that's great! I will check this next time I make it and update the timing appropriately.
Becky says
It came out amazing, but I only needed to knead it for 2min. to get it not to stick to the sides. Am I doing something wrong? There is not a lot of water in the recipe.
Kimberlee Ho says
That might happen. Continue kneading for the designated time to make sure it's kneaded fully. This will ensure the dough has the proper gluten formation to get the right consistency when it's baked.
Arlene G says
Can I use whole milk instead of water?
Kimberlee Ho says
I have not tried using whole milk instead of water so I can't say for sure how it will work out.
Erik C Goldberger says
When tripling the Challah recipe do I triple the yeast?
When using Kitchenaid 6, speed 2, at what point do I stop...when the sides and bottom are clean?
Thanks, Erik
Kimberlee Ho says
Yes and yes!
Susan says
This is my families favorite challah, however I always have to add additional flour. I have weighed the flour at 120 grams per cup and have also spoon measured into measuring cup leveling it off. I use King Arthur flour. Has this been a problem for anyone else.
Kimberlee Ho says
This is helpful, Susan. Interested to hear if anyone else has had this happen as well!
Sylvia says
Yes, I most definitely add more flour.
Kimberlee Ho says
Thanks for sharing - this is really helpful for other bakers!
Zelda Pinwheel says
I use 400g bread flour (not counting the initial 3T) and it comes out perfect.
Chava says
Love this recipe! My challah has always been too dry and dense, but this one is magical!! Only thing I do differently is add an extra egg yolk for richness.
Kimberlee Ho says
That's a great review! And a great tip, thanks for much for sharing 😊.
Jeff W. says
Made this a number of times now...The challah was great! Your tip about adding the tangzhong - something I never knew existed - was a huge addition to other breads, rolls, and even cinnamon buns! Thanks for the heads up...
Jeff
Kimberlee Ho says
so glad you love it, Jeff! The tangzhong is like magic 😊.
Jeff W. says
Hi Kim...Been meaning to let you know that I've really enjoyed this recipe - it's become my go-to Challah recipe for all occasions. The tangzhong addition really surprised me, but the difference it makes in the bread's consistency and texture is amazing! Using it in the cinnamon bun recipe is next up on my list! Thanks again...
Jeff
Kimberlee Ho says
How wonderful, Jeff! Thanks for commenting, I'm so glad it's your go-to challah recipe now. It is mine, too. Can't wait to hear how the cinnamon rolls come out!
Marci M says
For years I have been looking for a "soft" challah. I have now found it.. I am fascinated by the tangzhong (I hope I never have to pronounce that to anyone) method. I do not understand how it works, but it does!! I may add just a tiny bit more sugar. I have a bit of a sweet tooth when it comes to challah. I do have a couple of questions.
1. If I make two small loaves out of this recipe, how long would I cook them? and
2. Is there a "right" side to parchment paper? There was a weird crust on the bottom of my loaf, almost as if the parchment stuck. It was hard to chew. Very odd. I didn't accidentally use waxed paper (been there/done that). I am interested in your input.
All of my other challah recipes will be tossed. I have found my go to.
Thank you so much.
Kimberlee Ho says
I'm going to frame your comment, Marci! I agree, this recipe makes a super soft challah and it's the best! If you cut the dough in half to make two smaller loaves, I would check them after 15 minutes to see how they're coming along and bake for maybe 20-22 minutes. I haven't done this, so this is just an educated guess. Hmmm.. I haven't found that there's a "right" side of parchment.If your bread is sticking, you can try a silicone baking mat instead or try sprinkling the parchment with semolina flour or rice flour before placing the dough on top. Just try to keep the flour contained to underneath the bread so it doesn't burn in the oven. Let me know if that works! And thanks again for your comment ☺️.
Jr says
This came out great. When is the proper time to add chocolate chips. I added after the rise, and it was difficult to work in. Still tasted good. Did I do it right. Or is there another way?
Kimberlee Ho says
I would recommend adding the chocolate chips in when you add the flour and yeast in step 2. try it and let me know how it goes!
Ingrid says
I used your recipe to bake a challah today but the dough came our very wet and sticky instead of firm and dry. Weighed each ingredient and followed your directions.
Had to add quite a bit of flour to be able to manage the dough.
Haven't tried it yet. In the meantime, do you have any idea what could be the issue?
Kimberlee Ho says
I’m sorry to hear that! It’s hard to tell what went wrong but I would suspect there was too much liquid and it enough flour.
Cobie says
This was the most delicious challah bread I've ever baked. The tangzhong method makes a huge difference. My loaf came out feathery and light. My family and I ate the whole loaf in 20 minutes standing at the kitchen counter. Thank you for this recipe!
Kimberlee Ho says
This is a great review, thank you!! Me and my kids eat it over the kitchen counter too 😂. Tastes best that way!
Jenny says
How was it after you tried it? I had the exact same problem and did exactly what you did. I ended up adding an extra 30g flour (quarter cup) but it was still too wet. Kept falling apart during the braiding. It's in the 2nd proof stage right now so I'm not sure how it will turn out.. Let me know if you made any additional adjustments that fixed the issue.