With just 25 minutes of prep time, these no-bake cherry cheesecake bars have an impressive but easy to accomplish marbled top! The buttery no-bake graham cracker crumb crust is also easy to assemble with just 4 simple ingredients.
For best results, chill in no-bake bars in the refrigerator for at least 2 hours before serving. Prepared in an 8x8-inch square pan, yields 16 servings.
Looking for more easy no-bake dessert ideas? Try No-bake Chocolate and Nutella Pie - ready in 20 minutes, start to finish!

Disclosure: As an Amazon Associate, I earn from qualifying purchases.
Why You’ll Love This Recipe
No bake desserts are perfect when you are short on time or the weather is too warm to turn on the oven. I have lots of experience with no bake desserts, having tested (and tasted!) many so you don't have to. You can skip to the good part by making this tried and true recipe.
There are so many reasons to love this no bake cheesecake with graham cracker crust! Here are a few:
- no need to turn on the oven
- way easier to make than a baked cheesecake recipe, making it the perfect dessert to whip up when you're tight on time or for special occasions and family gatherings when you don't want to spend endless time in the kitchen
- buttery graham cracker crust and creamy cheesecake filling
- no sweetened condensed milk or cool whip added! Just real, simple ingredients
One Bite No Bake Mini Cheesecake Bites have an Oreo cookie crust instead of graham cracker crust - try these for a fun flavor variation in a single serve package.

Ingredients & Substitutions for no bake cheesecake with graham cracker crust
This easy recipe has three main components:
- graham cracker crust for the bottom layer
- cream cheese layer that sits on top of the graham cracker crust
- homemade cherry pie filling
But don't worry! None of them require much time to put together.
For the graham cracker crust, you'll need the following ingredients. The homemade crust may be substituted for a store-bought prepared graham cracker crust, if you'd prefer.
- Graham crackers: I choose to use graham cracker sheets and process them in the food processor into crumbs. You can instead purchase graham cracker crumbs from the grocery store
- Butter: I recommend using unsalted butter so you can control the level of salt in the recipe
- Granulated sugar
- Salt
For the cherry filling, you'll need the following ingredients. The homemade cherry filling my be substituted with store-bought prepared cherry pie filling, if you'd prefer.
- Cherries: can be fresh or frozen. Be sure to remove the stems and pits, if using fresh cherries
- Lemon juice: bottled lemon juice works just fine here
- Cornstarch: helps thicken up the pie filling
- Granulated sugar
The cream cheese filling requires only three ingredients!
- Cream cheese: I recommend using brick-style cream cheese rather than whipped cream cheese. Be sure to leave the cream cheese out of the fridge for about an hour before you use it. This will ensure it's perfectly softened to make a smooth cream cheese mixture without visible chunks of cream cheese
- Heavy cream
- Granulated sugar

How to make no bake cherry cheesecake
This is one of my favorite easy dessert recipes! Let's get baking:
Step 1
Line a square baking dish with parchment paper and set aside. Note: a 9-inch pie pan may be used instead
Step 2
Prepare the crust: To the bowl of a food processor, add the graham crackers and pulse to make fine crumbs. Combine graham cracker crumbs with sugar, salt and melted butter in the food processor bowl.
Pulse until the mixture comes together in a ball. Dump the graham cracker mixture into the prepared pan, pressing it down firmly into an even layer using the flat bottom of a measuring cup or glass.
Chill in the fridge for about 30 minutes while preparing the cherries and filling

Step 3
Prepare the cherries: In a medium bowl, whisk together the cornstarch, lemon juice, and warm water until the cornstarch has dissolved. Set aside.
Place the cherries and sugar in a medium saucepan over medium heat. Stir continuously for approximately 3 minutes until the cherry juices begin to release, pressing the cherries with the back of a spoon to break some of them apart.
Add the cornstarch mixture and continue to stir for another 2-3 minutes, smashing some cherries as you go. The mixture will start to thicken.
Remove from the heat and pour the mixture through a fine mesh strainer into a small bowl (this step separates the cooked cherries from the juice). Gently press the cherries to extract as much juice as possible.
Keep juice and cherries separated and set both aside. You should have about 1 cup cherries and ⅔ cup juice.


Step 4
Prepare the cheesecake filling: In the bowl of a stand mixer with the paddle attachment affixed or with a handheld electric mixer, add the softened cream cheese and beat on medium speed until smooth, about 2-3 minutes.
Turn the mixer off and add the heavy whipping cream and sugar. Beat on medium speed until thick and smooth, about 2 minutes, scraping the sides and bottom of the bowl as needed. Spread the cheesecake filling evenly on top of the chilled graham cracker crust.

Dollop the cherry juice over the cheesecake filling (you will not need all of it) then swirl gently with a knife. Resist the urge to continue swirling or you'll end up losing the definition in the gorgeous swirls.


Step 5
Chill the cheesecake at least 2 hours. Slice then top with remaining cherries before serving.

Pro Tips
- To save time, a store-bought prepared graham cracker crust may be used. Use a 9-inch round pie plate instead of the square baking pan, as most pre-made crusts are for round pie pans.
- The recipe may be made in a round 9-inch pie pan instead of a square baking dish. Prepare as directed
- To store, tightly wrap the baking pan with foil or plastic wrap and keep in the refrigerator for up to 5 days. Store cherries separately in an airtight container in the fridge
- Cheesecake bars may be frozen for up to 3 months. Thaw overnight in the fridge
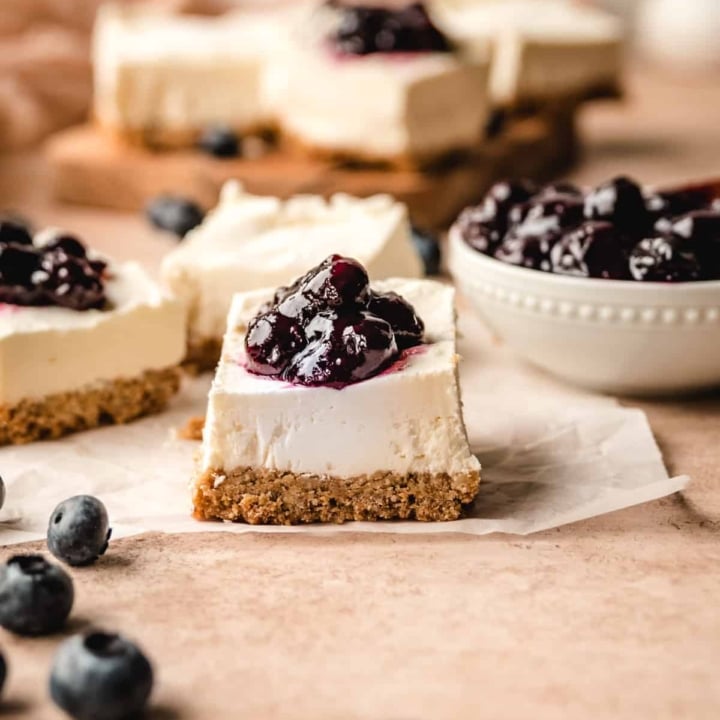
- This recipe can be made using other types of fruit such as blueberry or raspberry. For more variations, try Blueberry Goat Cheese Cheesecake Bars, No Bake Coconut Balls with Condensed Milk and Caramel Apple Cheesecake Bars!
Like this recipe? Follow me on Pinterest for lots more recipes just like this one! And don’t forget to pin this recipe for later by clicking on one of the images below the recipe. Or, click on any of the images in this post to save to Pinterest.
FAQs
Can a can of cherry pie filling be substituted for the cherries in cherry cheesecake?
Yes! Feel free to substitute the homemade cherry filling with canned cherry pie filling. Since cherry pie filling tends to be thicker than the homemade mixture, there's no need to strain it. Simply swirl in the cherry pie filling as is into the cream cheese layer.
Can I use a pre-made graham cracker crust for this recipe?
Absolutely! Using a prepared graham cracker crust will save you some time so go ahead and use it if you'd prefer. Most prepared graham cracker crusts are 9-inch rounds made for using in a pie pan. This recipe will work the same whether made in a round pie pan or a square baking dish.
What tastes better baked or no-bake cheesecake?
This is a matter of personal preference! No-bake cheesecake is creamy and tends to be looser (not as firm) as baked NY-style cheesecake. Both taste very good, it's just a matter of what you prefer.
Why is my no-bake cheesecake not firm?
No-bake cheesecake is not baked the same way NY-style or other kinds of baked cheesecakes are. There's no eggs to bind the ingredients either. No bake cheesecake filling is made from cream cheese, heavy cream and sugar only and is chilled rather than baked. Therefore, no bake cheesecake will be softer and looser than baked cheesecake.

FOR ALL MY FAVORITE BAKING TOOLS INCLUDING THOSE USED TO MAKE THIS RECIPE, CHECK OUT MY BAKING RESOURCES PAGE!
More Recipes


Did you enjoy a KICKASS BAKER recipe? Please share a comment and leave a 5 Star ⭐️⭐️⭐️⭐️⭐️ Rating on this recipe! We appreciate you sharing your feedback!

Ingredients
Graham cracker crust
- 1 ¼ cups graham cracker crumbs about 8-9 full sheet graham crackers
- 8 tablespoons unsalted butter melted
- ¼ cup granulated sugar
- pinch of salt
Cherries
- 16 ounces cherries fresh or frozen, pitted and destemmed
- 1 tablespoon warm water
- 1 teaspoon fresh lemon juice
- 2 teaspoons cornstarch
- 2 tablespoons granulated sugar
Cheesecake Filling
- 8 ounces cream cheese softened to room temperature
- 2 cups heavy cream
- ¼ cup granulated sugar
Instructions
- Line an 8x8-inch square pan with parchment paper and set aside
Make the Graham Cracker Crust
- To the bowl of a food processor, add the graham crackers and pulse to make fine crumbs. Add the sugar, salt and melted butter to the graham crackers. Pulse until the mixture comes together in a ball. Dump the graham cracker mixture into the prepared pan, pressing it down firmly into an even layer using the flat bottom of a measuring cup or glass. Chill in the fridge for about 30 minutes while you prepare the cherries and filling
Make the Cherries
- Whisk the cornstarch, lemon juice, and warm water together in a small bowl until the cornstarch has dissolved. Set aside. Place the cherries and sugar in a medium saucepan over medium heat. Stir continuously for 3 minutes until the cherry juices begin to release, pressing the cherries with the back of a spoon to break them apart. Add the cornstarch mixture and continue to stir for another 2-3 minutes, smashing some cherries as you go. The mixture will start to thicken. Remove from the heat and put the mixture through a fine mesh strainer into a small bowl (to separate the cooked cherries and the juice). Keep separated and set both (the cooked cherries and the juice) aside. Yields about 1 cup cherries and ⅔ cup cherry juice
Make the Cheesecake Filling
- In the bowl of a stand mixer with the paddle attachment affixed or with a handheld electric mixer, add the softened cream cheese and beat on medium speed until smooth, about 2-3 minutes. Turn the mixer off and add the heavy whipping cream and sugar. Beat until thick and smooth, about 2 minutes, scraping the sides and bottom of the bowl as needed. Spread the cheesecake filling evenly on top of the chilled crust. Dollop the cherry juice over the cheesecake filling (you may not use all of it) then swirl gently with a knife. Resist the urge to continue swirling
- Chill at least 2 hours. Slice and top with remaining cherries before serving
Notes
- To save time, store-bought graham cracker crust may be used. Use a 9-inch pie plate instead of the square baking pan, as most pre-made crusts are made for round pie pans
- Recipe may be made in a 9-inch pie pan as well
- Store tightly wrapped with plastic wrap in the refrigerator for up to 5 days. Store cherries and cheesecake separately.
- Cheesecake bars may be frozen for up to 3 months. Thaw overnight in the fridge
Nutrition
