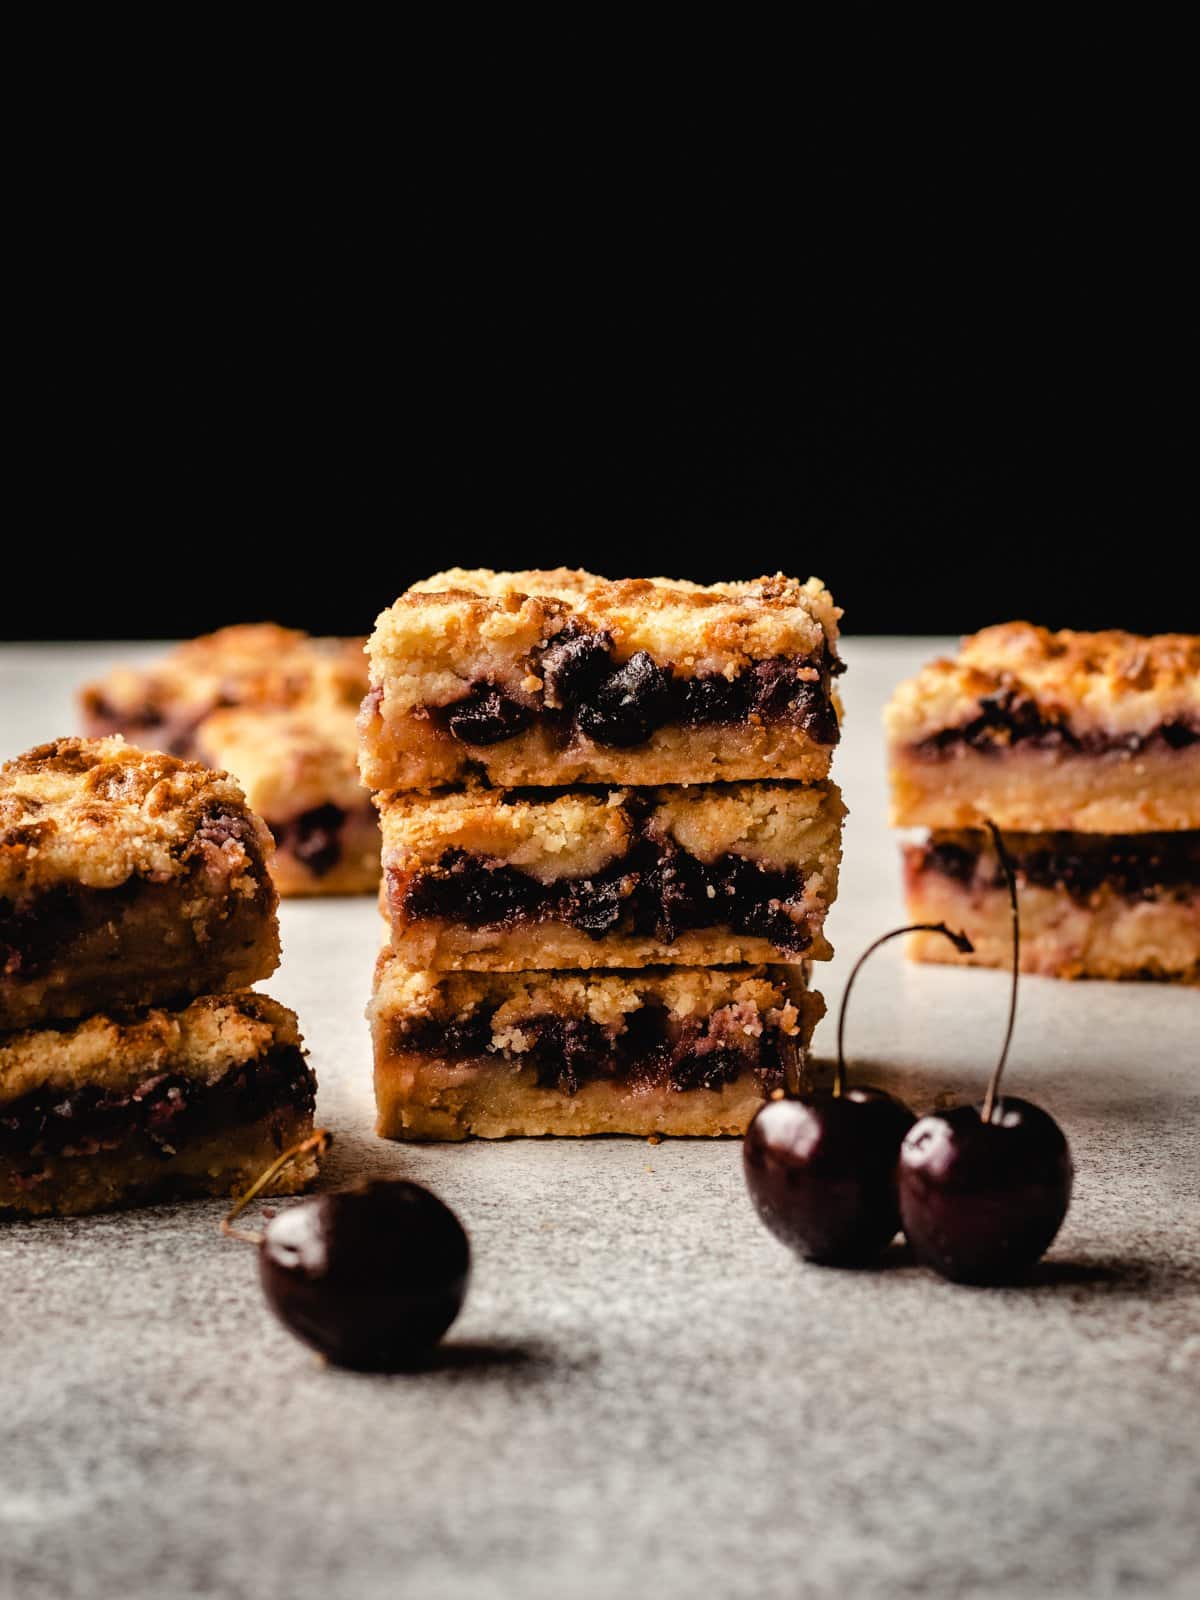
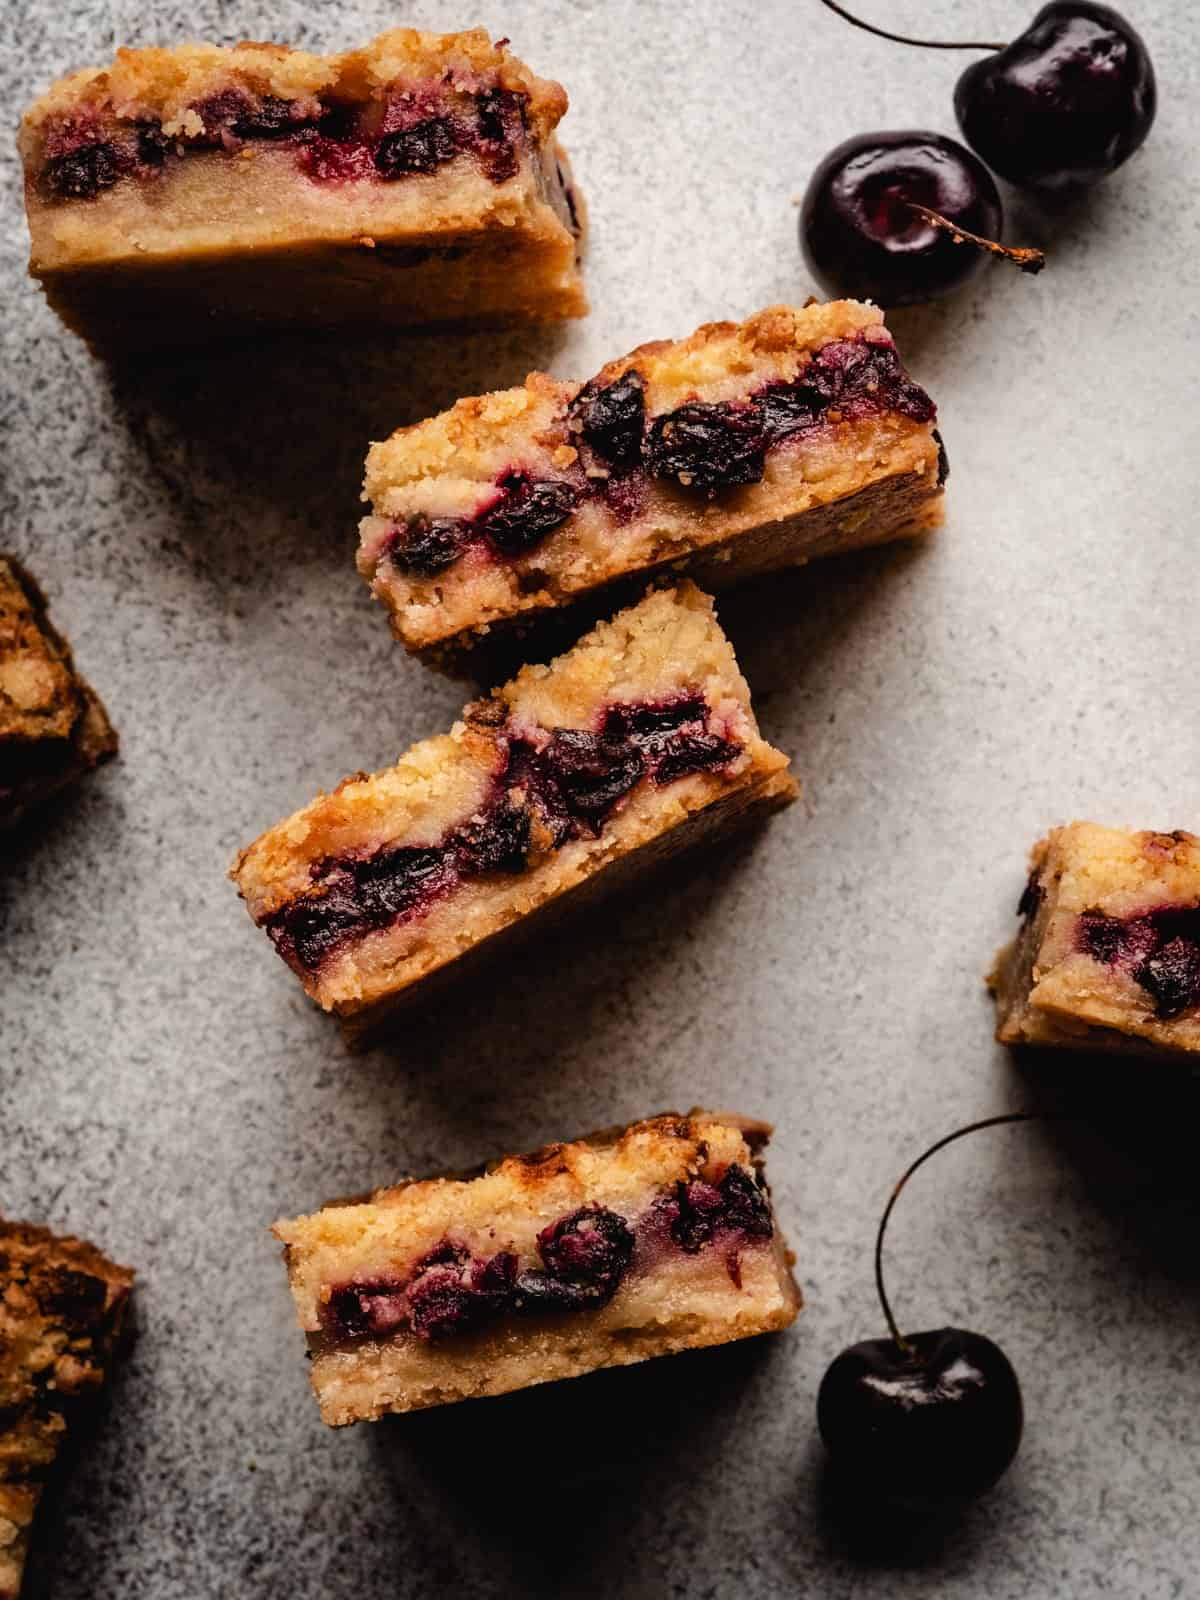
This is cherry pie made into an easy recipe that's sure to become a family favorite! With a golden brown crust and loads of cherry flavor, this Cherry Pie Bar recipe is one delicious dessert. These individual bars are a wonderful recipe alternative to traditional pie. These can be made using fresh cherries or frozen cherries or even canned cherry pie filling! As far as cherry desserts go, this pie in bar form is at the top of the list.
This recipe comes from a wonderful cookbook called Back In The Day Bakery Cookbook.
Love cherry dessert recipes? Try 25-Minute Prep No-Bake Cherry Cheesecake Bars. Chocolate Torte with Cherry Whipped Cream, and Bourbon Cherry Cheesecake Ice Cream.

Disclosure: As an Amazon Associate, I earn from qualifying purchases.
Why you'll love this recipe
Here are a few more reasons you'll love this easy cherry pie bars recipe:
- This particular recipe is the perfect way to serve pie without the hassle of making homemade pie crust
- Can be made using fresh or frozen cherries to make a homemade cherry pie filling or can be made using cans of cherry pie filling for convenience
- Makes delicious bars that do not require forks, knives, serving utensils or even plates!
- Perfect way to make sweet cherry pie for the holidays or any time of year
- The cherries can be substituted for apple slices to make apple pie bars, too!

Ingredients & substitutions
There are two main components to this recipe: a buttery shortbread crust that is also used on top of the pie filling and the cherry filling. I combined the ingredients for both into one list here - see the recipe card below for how much you'll need for each component:
- All-purpose flour
- Granulated sugar
- Salt
- Butter: I recommend using unsalted butter so you can control the level of salt in the recipe. Be sure to remove the butter from the fridge at least 30 minutes prior to baking to allow it to come to room temperature
- Eggs: This recipe calls for large eggs. For best results, be sure to remove them from the fridge at least 30 minutes prior to baking to allow them to reach room temperature. Cold ingredients don't combine well with other ingredients
- Sour cream: Be sure to use full-fat sour cream. Can be substituted for plain full-fat Greek yogurt, if needed
- Cherries: Use fresh or frozen cherries. If using fresh, be sure to stem and pit them. Sweet cherries or tart cherries may be used. Avoid using sour cherries or maraschino cherries from a jar. Cherry pie filling may be substituted for the cherry filling. See the recipe card for more specifics on this
How to make Cherry Bars
Step 1
Preheat the oven to 350ºF. Grease a 9 x 13-inch baking pan and line with parchment paper, allowing the ends of the paper to hang over two opposite edges of the pan. Set aside.
Step 2
In the bowl of a stand mixer fitted with the paddle attachment, combine the dry ingredients and mix on low speed until well blended.
With the mixer running on low, add the cubed butter a little at a time, beating until the mixture looks dry and crumbly, like wet sand.
Set aside 1 ½ cups of the mixture for the top of the bars; refrigerate it while the crust is baking.
Press the remaining dough evenly into the bottom of the prepared pan. Bake for 12-15 minutes, until lightly golden brown. Remove from the oven and allow to cool while preparing the filling
Step 3
Prepare the filling: In a large bowl, whisk together the sugar, flour, and salt. Add the eggs and sour cream and whisk until smooth.
Gently fold in the cherries, mixing with as few strokes as possible. Pour the filling over the slightly cooled crust.
Sprinkle the reserved crumb topping evenly on top of the filling. Bake in the preheated oven for 45-55 minutes, until the top is golden brown and bubbly.
Remove the bars from the oven and allow to cool on a wire rack for at least an hour before cutting into squares. Alternatively, scoop them out with a spoon while they are warm and serve with vanilla ice cream.

Pro tips
- For this recipe, the cookbook suggests using two 16-ounce bags of frozen cherries. I actually made these with just over one pound (16+ ounces) of fresh cherries and they came out perfectly. My recommendation would be to use whatever you can get your hands on. If it's cherry season, definitely try fresh if you can find them in your area
- If substituting canned cherry pie filling in this recipe, there's no need to prepare the cherry pie filling according to the recipe instructions. Simply substitute the prepared filling for the homemade pie filling
- As the recipe states, these cherry pie bars need to cool completely before they're sliced into bars. You can slice them into 12 very large bars or 24 smaller bars. I opt for the smaller bars. If you can't bear the wait for these bars to cool or you don't have enough time for them cool, you can scoop them out of the pan while warm and serve with a scoop of ice cream

Like this recipe? Follow me on Pinterest for lots more recipes just like this one! And don’t forget to pin this recipe for later by clicking on one of the images below the recipe. Or, click on any of the images in this post to save to Pinterest.
FAQs
Can you substitute cherry pie filling for this homemade cherry filling?
Yes. If substituting canned cherry pie filling in this recipe, there's no need to prepare the cherry pie filling. Simply substitute the prepared filling for the homemade pie filling.
The flavor of the homemade filling is so worthwhile to take the time to make. However, if you cannot find fresh or frozen cherries or you are running short on time, using canned pie filling is an option.
Can you substitute a graham cracker crust?
The best part of this recipe is that buttery crust and topping. I would not recommend substituting a graham cracker crust here. For best results, make the recipe according to the instructions and ingredients.
Can you add a glaze over the crust?
Yes! A delicious cream cheese glaze can be drizzled on top of the cooled bars. Whisk together 1 cup powdered sugar, 1 teaspoon vanilla extract plus 2 tablespoons milk.
How can these cherry pie bars be stored?
Once the bars are cooled, store in an airtight container at room temperature for up to 4 days. Store in the fridge for up to one week and freeze for up to 3 months.
FOR ALL MY FAVORITE BAKING TOOLS INCLUDING THOSE USED TO MAKE THIS RECIPE, CHECK OUT MY BAKING RESOURCES PAGE!
More recipes


Check out all my Treats recipes!

Did you enjoy a KICKASS BAKER recipe? Please share a comment and leave a 5 Star ⭐️⭐️⭐️⭐️⭐️ Rating on this recipe! We appreciate you sharing your feedback!

Ingredients
Crust + Topping:
- 3 cups all-purpose flour
- 1 ½ cups granulated sugar
- ½ teaspoon kosher salt
- 1 ½ cups unsalted butter (3 sticks) room temperature, cut into cubes
Filling*:
- 2 cups granulated sugar
- ¾ cup all-purpose flour
- pinch of kosher salt
- 4 large eggs room temperature
- 1 cup full-fat sour cream
- 1 ½ - 2 pounds fresh cherries pits removed and quartered or 16-ounce packages frozen cherries, thawed and drained
Instructions
- Preheat the oven to 350ºF (180ºC).
- Grease a 9 x 13-inch baking pan and line with parchment paper, allowing the ends of the paper to hang over two opposite edges of the pan. Set aside.
Make the Crust and Topping:
- In the bowl of a stand mixer fitted with the paddle attachment, combine the flour, sugar, and salt and mix on low speed until well blended.3 cups all-purpose flour, 1 ½ cups granulated sugar, ½ teaspoon kosher salt
- With the mixer running on low, add the cubed butter a little at a time, beating until the mixture looks dry and crumbly, like wet sand.1 ½ cups unsalted butter
- Set aside 1 ½ cups of the mixture for the topping; refrigerate it while the crust is baking.
- Press the remaining mixture evenly into the bottom of the prepared pan.
- Bake for 12-15 minutes, until lightly golden brown.
- Remove from the oven and allow to cool at least 10 minutes before adding the filling.
Prepare the Filling:
- In a large bowl, whisk together the sugar, flour, and salt.2 cups granulated sugar, ¾ cup all-purpose flour, pinch of kosher salt
- Add the eggs and sour cream and whisk until smooth.4 large eggs, 1 cup full-fat sour cream
- Gently fold in the cherries, mixing with as few strokes as possible.1 ½ - 2 pounds fresh cherries
- Pour the filling over the slightly cooled crust.
- Sprinkle the reserved crumb topping evenly on top of the filling
- Bake in the preheated oven for 45-55 minutes, until the top is golden brown and bubbly.
- Remove the bars from the oven and allow to cool for at least an hour before cutting into squares. Alternatively, scoop them out with a spoon while they are warm and serve with vanilla ice cream.
Notes
- *If substituting canned cherry pie filling in this recipe, there's no need to prepare the cherry pie filling according to the recipe instructions. Simply substitute the prepared filling for the homemade pie filling
- Once the bars are cooled, store in an airtight container at room temperature for up to 4 days. Store in the fridge for up to one week and freeze for up to 3 months.
- Recipe from The Back in the Day Bakery Cookbook
Nutrition


Comments
MaryEllen says
I haven't made them yet because I have a question. Can canned sour cherries (not canned cherry pie filling) be used in this recipe? Thank you.
Kimberlee Ho says
That should work just fine!
Falco Rodriguez says
Awesome recipe and really easy to follow!
Kim says
So happy to hear that!
Tasia ~ two sugar bugs says
I usually have a good stash of frozen cherries after our summer picking, but my little e has discovered she loves the frozen cherries and I only have a handful left from this summer. I may have to give them a whirl with another berry because they definitely sound dreamy!