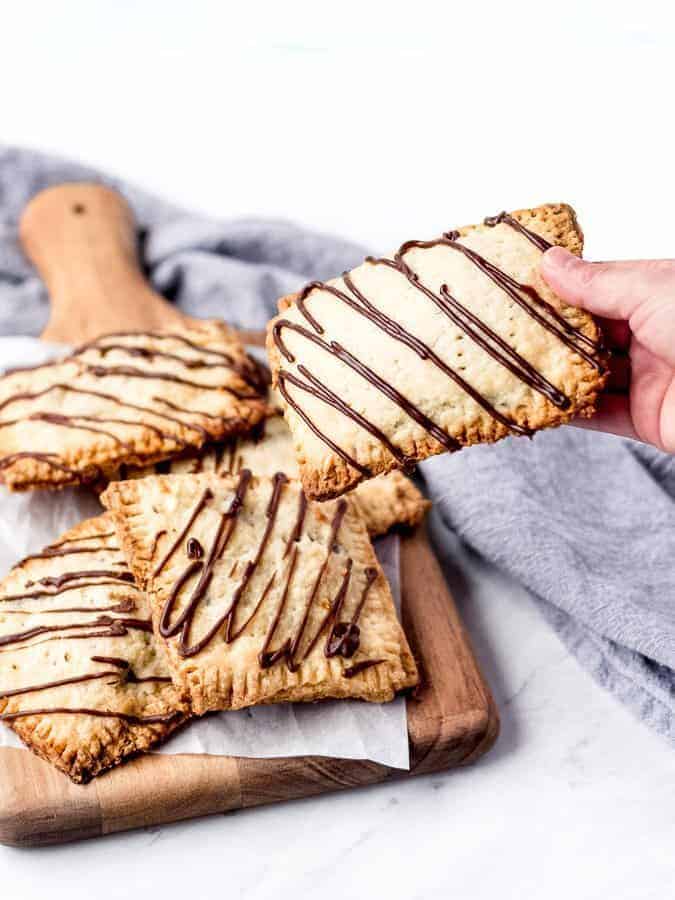
These Chocolate Toaster Pastries, also known as homemade Chocolate Pop Tarts, are so tasty with a flaky crust and just the right amount of chocolate and sweetness to make them acceptable enough for breakfast.
However, they are much healthier and definitely much tastier than the ones you buy in a box.

Disclosure: As an Amazon Associate, I earn from qualifying purchases.
Why Buy Pop tarts When You Can Make 'Em?
My older daughter and I argue every morning before school about what she's going to eat for breakfast. If it were up to her, she'd either not eat or eat Girl Scout cookies for breakfast.
Since that ain't happening, I'm constantly trying new homemade versions of the boxed stuff she seems to gravitate to in the grocery store. Pop Tarts or toaster pastries are definitely on her list of faves.
So, I recently embarked upon creating a version of Chocolate Toaster Pastries that's made from scratch. And, even though it's not as healthy as say, fruit and organic whole grain steel cut oats, it's much better than a) hearing her whine and complain that "there's nothing to eat in this house!" and b) the boxed stuff.
Of course, life isn't perfect, but it's all about balance and having her enjoy these Toaster Pastries for breakfast, my friends, is a win in my book! Even if it does go against my mom's no-chocolate-for-breakfast rule.

How To Make Homemade Chocolate Pop Tarts
To make these delicious breakfast treats, you'll first cook up an easy chocolate filling. The filling is also used to ice the pastries once they're cooled.
You can always freeze them before icing them, too. Allow the filling to cool a bit while you prepare the pastry. If you don't own a pastry cutter, you can use two knives to literally cut the butter into the flour and sugar.
The idea is to create pea-sized balls of flour, sugar and butter to which you can then add some liquid to form a stiff dough.
Rolling Out the Dough
Once the dough has come together, flour your work surface (this is very important so that dough doesn't stick and you can lift it off onto a baking sheet) and rolling pin and cut into rectangles.
You'll want to make sure you cut the rectangles into evenly sized pieces - you'll be topping each of these with identically sized rectangles from the second half of the dough and if the sizes don't match, you risk leakage from the filling whilst it's baking.
And no one wants that!
As you can see from my photo below, I got 4 rectangles out of this piece of dough. Take the trimmings you cut off to make the rectangles and re-roll them to cut out additional rectangles.
You should get 6 to 9 rectangles out of each half of the dough.

Here Comes the Chocolate!
Once you have cut rectangles out of the first half of the dough, whisk up an egg wash using the egg and milk and brush onto the pastry.
Then, take about a tablespoon of the chocolate filling and place in the center of the pastry, spreading it a bit and leaving a ½ inch border so that you can seal these puppies up.

Bringing it All Together
Now roll out the second half of the dough in the same way you did the first and place one rectangle on top of each prepared pastry bottom.
Press the top and bottom together to seal, then use the tines of a fork to press into the edges of each pastry, working your way around all four sides.
Be sure to prick the top of each prepared pastry with a fork to allow steam to escape while they're baking. Stick the baking sheet in the fridge for 30 minutes then you're ready to bake!

You Can Never Have Enough Chocolate (Even for Breakfast)
After baking, allow the homemade pop tarts to cool completely before icing the tops. Otherwise, the icing will melt right off and it will not look pretty whatsoever.
You'll want to heat up the remaining chocolate filling until it's loose and spreadable. Fill a plastic squeeze bottle with the chocolate and drizzle on top.
If you don't have a squeeze bottle, dip the tines of a fork into the chocolate and shake gently back and forth across the top of the pastries to get the drizzled effect. You may also freeze the pastries before icing them for up to 3 months.
Like this recipe? Follow me on Pinterest for lots more recipes just like this one! And don’t forget to pin this recipe for later by clicking on one of the images below the recipe. Or, click on any of the images in this post to save to Pinterest.
Gluten-free toaster pastries
I have not tried making gluten free toaster pastries, however, I have had good results with similar recipes substituting cup-for-cup or measure-for-measure gluten-free flour for the all-purpose flour.
I would recommend a high quality brand such as Bob’s Red Mill. Be sure it says cup-for-cup, measure-for-measure, or 1-to-1 on the label.
Vegan toaster pastries
I have not tried making the recipe vegan, however, I would recommend substituting the eggs for flax eggs (2 tablespoons (18 grams) flax meal + 5 tablespoons (74 ml) water), substituting the milk for non dairy alternatives such as almond or oat milk, and substituting the butter for a vegan butter that's suitable for baking.
The chocolate can be substituted for dairy-free chocolate as well.
FOR ALL MY FAVORITE BAKING TOOLS INCLUDING THOSE USED TO MAKE THIS RECIPE, CHECK OUT MY BAKING RESOURCES PAGE!
For more breakfast recipe ideas, give these a try:


Did you enjoy a KICKASS BAKER recipe? Please share a comment and leave a 5 Star ⭐️⭐️⭐️⭐️⭐️ Rating on this recipe! We appreciate you sharing your feedback!
Ingredients
Chocolate Filling
- 1 ½ cups semisweet chocolate chips
- 4 tablespoons unsalted butter
- 2 cups powdered sugar
- 4 tablespoons warm milk
Pastry Dough
- 2 cups all-purpose flour
- 2 tablespoons granulated sugar
- 1 teaspoon salt
- 1 cup unsalted butter cold and cubed
- 1 large egg room temperature
- 3 tablespoons milk
Egg Wash
- 1 large egg room temperature
- 1 tablespoon milk
Instructions
Make the Chocolate Filling:
- In a heavy 1-quart saucepan over low heat, cook the chocolate chips and the butter until the mixture is melted and smooth. Stir in the powdered sugar followed by the milk. Set aside.1 ½ cups semisweet chocolate chips, 4 tablespoons unsalted butter, 2 cups powdered sugar, 4 tablespoons warm milk
Make the Pastry:
- Line a baking sheet with parchment paper or silicone mat. Set aside. In a large bowl, whisk together the flour, sugar, and salt. Using a pastry blender, cut in the butter until it is the size of peas and the mixture holds together when you squeeze it.2 cups all-purpose flour, 2 tablespoons granulated sugar, 1 teaspoon salt, 1 cup unsalted butter
- In a small bowl, whisk together the egg and milk and add to the dough. Mix together with a fork until everything is evenly moistened. If the dough looks very dry or crumbly and is not holding together at all, add a splash more of milk.1 large egg, 3 tablespoons milk
- Turn the dough out onto a floured surface and knead briefly, if necessary, until the dough comes together. Using a very sharp knife or bench scraper, divide the dough in half. Place one half aside. Flour your surface and rolling pin to be sure the dough does not stick. With the rolling pin, roll out one piece of the dough to about ⅛-inch thick and into a 9½ by 12½ rectangle. Using a sharp knife, pastry wheel or bench scraper, trim the rectangle to 9x12 inches. Cut the sheet of dough into six to nine 3x4-inch rectangles. Using a spatula, transfer the rectangles to prepared baking sheet
- In a small bowl, whisk together the egg and milk for the egg wash. Brush the egg wash on each of the rectangles.1 large egg, 1 tablespoon milk
- Spoon a tablespoon of filling into the center of each rectangle, leaving a ½-inch of space around the edges. With the second half of the dough, roll it out and cut it in the exact same manner as you did the first, being sure the rectangles are evenly sized. One at a time, place a second rectangle of dough on top of the assembled ones on your baking sheet. Using your fingers, press around the seams of the dough to make sure they are sealed. Press the tines of a fork around the edges of the rectangles. Prick the tops of the rectangles in multiple spots to allow steam to escape.
- Refrigerate the pan with the pastries, uncovered, for 30 minutes. With 10 minutes remaining in the chilling time, preheat the oven to 350ºF.
- Bake the pastries for 25 to 30 minutes, or until lightly browned. Cool them completely.
- Warm the leftover chocolate filling in the saucepan over low heat until it loosens and becomes spreadable. Ice the top of each pastry and serve.
Notes
- After you divide the dough in half, you can wrap each half in plastic wrap and refrigerate for up to 2 days. If you refrigerate the dough, let it come to room temperature for about 15 minutes before rolling out and continuing with the instructions above.
- Store pastries in an airtight container at room temperature for up to one week. Warm in the toaster oven or microwave before serving.
- Recipe adapted from Brown Eyed Baker.
Nutrition


Comments
Caryn says
Wouldn’t you egg wash after you put the tops on? Not before?
Kim says
Hi Caryn! The egg wash actually goes on the bottom piece of dough, the piece that gets the filling added to it. The egg wash helps hold the two pieces of dough together when you place the top on. You can add egg wash to the tops of the pastry as well if you'd like to get a glossy finish!
Home Plix says
Your recipe is really great. I just love your blog. Thanks for sharing your helpful blog.
Kim says
How wonderful, thank you so much!!